Friday 29 January 2016

Developing Web Products - Audio & Video

Lesson Objectives 

LO1 - To learn how to embed media using Dreamweaver
LO2 - To learn how to use HTML code to play only on click

Outcomes
Red - You will have added a sound or movie to your website
Amber - You will have embedded media on your webisite
Green - You will have added code to allow media to only play on click

Starter


  • Look at the how to embed media page of my website
  • What is wrong with it?
  • How could it make it better?


Main


RED TASK

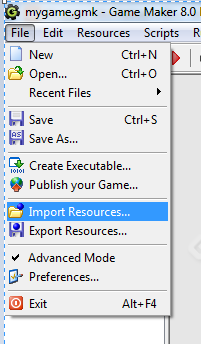
  • The files you will need for today's lesson are stored here:
    \\files.wildern.hants.sch.uk\read\ICT\Audio_Video
    1.Copy and paste the filepath in to Windows Explorer. 
    2. Copy and paste BOTH files to your Exam Revision Website ASSETS folder

      AMBER TASK

      • Embed the movie file on your How To Embed Media page
      • Embed the sound file on your How To Embed Media page

      GREEN TASK

      • Using the <embed> HTML tag embed your video on to the How to Embed Media page of your websiite so that it only plays on click
      • <embed src="Path to your video here" controls="controls" width="width in pixels" height="height in pixels"></embed>

      • Use the <embed> HTML tag to embed your sound on to the How to Embed Media page of your 
      • <audio src="Path to your sound here" controls="controls"></embed>


        EXTENSION TASK

        • Continue to add content to the pages of your websites


        Plenary

        • Test your website
        • Open your homepage in Chrome or Internet Explorer
        • Does it all work correctly? Do you need to change / fix anything?

        Wednesday 27 January 2016

        Unit 2 - Hardware Revision/Assessment

        Lesson Objectives

        Evaluate learning in Computer Science so far using online resources
        Assess current understanding of the topic Hardware

        Revision Time! (25 mins)
        Use the links below to help you revise for your hardware test.
        Use the notes in your book and on Mrs Palmer's blog to help you as well. 


        Assessment Time! (25 mins)

        1. Write your name clearly on the top of your Assessment paper
        2. Read through the questions carefully
        3. Look at the amount of marks each question is worth - try and make that many points in your answer
        4. Answer EVERY question, even if you are unsure - you might get a mark!

        Monday 25 January 2016

        Developing Your Revision Exam Website

        How to Guide


        How to Videos


        Developing Your Exam Revision Website

        Main


        RED TASK - Link Your Pages
        • Create a link to each of your pages in the navigation bar
          • Homepage
          • How to Make a Template
          • How to Make pages from a template
          • How to Insert an Image
          • How to Make a Link
          • How to Change the Screen Resolution
          • How to Embed Media
          • Visual Accessibility
          • Helpful Websites 
        • REMEMBER - you must type in the name of the page you are linking to exactly as you saved it. It is case sensitive

          AMBER TASK - Add content to first 2 pages

          • Add explanations and screenshots to the first two pages of your website
            • How to make a template
            • How to make pages from template
          • Make sure any images that you use are saved in the IMAGES folder as PNG or JPEG

          GREEN TASK - Add content to second 2 pages
          • Add explanations and screenshots to the second two pages of your website
            • How to insert an image
            • How to make links

          • Make sure any images that you use are saved in the IMAGES folder as PNG or JPEG

          Plenary


          • Test your website
          • Open your homepage in Chrome or Internet Explorer
          • Does it all work correctly? Do you need to change / fix anything?

          Scratch - Lesson 2 - 'IF'

          Lesson Objectives 
          LO1 To understand how to use selection programming using 'if' statements


          Outcomes
          Red - You will be able to explain what selection is
          Amber - You will used an IF block for your enemy character
          Green - You will have used an IF ELSE block on your good character


          Starter


          Main


          Task 1: 'If' in Scratch
          a) Launch your Scratch game from last lesson
          b) Add some code blocks to your game for the enemy sprite that:
          • makes the enemy sprite move in a random direction
          • if touching the edge bounce away
          Try experimenting with the degrees and steps


          Task 2: If Else

          Task 3: 'If Else' in Scratch
          a) Edit the code blocks of your main character sprite to include an 'If Else' statement
          Try changing the 'mouse down?' block and the timings on 'say'


          Extension 

          Add in some If and If Else statements of your own into the game


          Plenary

          a) Open your Scratch Evidence Document that you started last lesson
          b) Complete the Lesson 2 section
          c) Save your work


          Homework

          Complete the next task Task 6 Scratch Keywords in your HomeStudy Booklet

          Wednesday 20 January 2016

          Binary & Logic - Sequencing

          Lesson Objectives

           - to understand how to write sequences in a logical order


          Starter

          On a piece of paper, write these steps in the correct order for Cooking a Meal numbered 
          1 - 9.


          Main

          Red Task:
          Click HERE to test your sequencing skills.


          Orange Task
          Place a copy of the image below on your Blog and explain what it has to do with Computer Science.


          Green Task
          See DRAG and DROP - Exercises 5-9 on ICT WORKOUT quizzes.

          SEQUENCING - click HERE


          Plenary

          On your Blog, write a simple sequence of instructions, as the one in the Starter, for 'Getting Ready for School' in the morning.

          Monday 18 January 2016

          Alternative Binary

          Lesson Objectives

           - consolidate your understanding of Binary numbers

          Starter


          Main

          Red Task:
          Take the Binary number test HERE and place a snipping of your result on your blog 


          Orange Task
          Working in pairs, create a Binary poster, Powtoon or Prezi explaining Binary to a student in KS3

          See examples:


          Green Task
          Test your Binary to Denary knowledge HERE

          Plenary

          Test your knowledge HERE

          Friday 15 January 2016

          Developing Web Products - Build Your Own Revision Website 2

          Lesson Objectives 
          LO1 - To learn how create pages from a template in Dreamweaver
          LO2 - To learn how to link pages from a template in Dreamweaver

          Outcomes
          Red - You will have added a banner to your template
          Amber - You will have created pages from your template
          Green - You will have linked the different pages 

          Starter


          Main

          RED TASK - Create Pages from Your Template
          • Create the following pages from your template
            • Homepage
            • How to Make a Template
            • How to Make pages from a template
            • How to Insert an Image
            • How to Make a Link
            • How to Change the Screen Resolution
            • How to Embed Media
            • Visual Accessibility
            • Helpful Websites 
          • Make sure that you save each page with a suitable

          AMBER TASK - Link Your Pages

          • Create a link to each of your pages in the navigation bar

          GREEN TASK - Begin To Add Content

          • Add explanations and screenshots to the first two pages of your website
            • How to make a template
            • How to make pages from template
          • Make sure any images that you use are saved in the IMAGES folder as PNG or JPEG


          Plenary


          Test your website
          Open your homepage in Chrome or Internet Explorer
          Does it all work correctly? Do you need to change / fix anything?

          Using Elements from Other Games in GameMaker


          Maze Game example

          Do you like the way a character moves in a game?
          Do you like the way collecting an object adds points to your score?
          Do you like the way touching an object takes you to the next level?
          You too could have these elements in YOUR game!!!!!!


          TASK 1 - Choosing a Game
          Look at Templates you could use
          (Copy and paste link below in to Windows Explorer)


          \\files.wildern.hants.sch.uk\read\ICT\Mrs Palmer\DA204 - Game Play\Game Types
          You'll need to have GameMaker open and click on the .gmk files to view


          Task 2 - Exporting Elements from the Game Template
          Using elements from the Template game.

            a) File - Export Resource

          b) Choose a location to save the elements


          c) Choose JUST the elements you want to export


          Task 3 - Importing Elements to YOUR Game
          a) Go back in to your game and choose File - Import Resources


          b) Be sure to tick the box to place ALL imported resources in to a new group

          NB. This will place ALL imported resources in to a game folder in your game as shown below

          Thursday 14 January 2016

          Controlled Assessment 2 - User Needs

          Lesson Objectives 
          LO1 - To identify and understand the user needs for the Memory Game

          Outcomes
          Red - You will have helped identified the user needs for your teams task
          Amber - You will have understood the user needs identified by the other teams
          Green - You will have updated the user needs section of your evidence document

          Starter


          Main

          RED TASK
          • Read through the task your team have been given and identify the User Need

          AMBER TASK
          • Feedback the User Needs identified by your team

          GREEN TASK
          • Listen to the User Needs that the other teams have identified and note them on your sheet

          Plenary

          • Open your Memory Game CA document in WORD
          • Find the USER NEEDS section
          • Using what you have learnt in today's lesson write up the user needs for TASK 1 - 9

          Wednesday 13 January 2016

          Unit 2 - Hardware - Innovative Technology

          Lesson Objectives
          • To learn about developments in memory and processor technologies
          • To learn about developments in input, output and storage technologies
          • To discuss how developments in different hardware technologies are leading to innovative new products being created

          Starter


          Click on the image above to see other innovative products 


          Main


          Read the exam question below:
          Discuss how developments in hardware technologies are leading to innovative products being created. In your answer you should cover the following technologies: memory, processors and storage devices.

          In this question you will be marked on your ability to use good English, to organise information clearly and to use specialist vocabulary where appropriate.


          Assessment Task

          Working with a partner, create a presentation, using software of your choice, to answer the above question.


          Useful Websites
          History of Storage - HERE
          History of Processing - HERE

          Homework:
          Be ready to present your work next lesson.

          Monday 11 January 2016

          Developing Web Products - Build Your Own Revision Website 1

          Lesson Objectives 
          LO1 - To learn how to manage sites and create a template in Adobe Dreamweaver
          LO2 - To learn how to customise a template in Adobe Dreamweaver

          Outcomes
          Red - You will have setup a folder structure for your website
          Amber - You will have created a suitable template and banner 
          Green - You will have created pages from your template

          Starter


          1. Set up this folder structure


          2. Manage your site to the Exam Revision Website Folder

          1. Click on Site menu - New Site
          2. Click on the folder icon


          3. Select the Exam Revision Website folder

          Main

          • Task 1 - Create Your Template
            • Use the worksheet to create a template for your Exam Revision Website

          • Task 2 - Create a Banner
            • Use Adobe Photoshop / Fireworks to create a banner for the top of your template
            • The banner should measure 1024 w x 200 h pixels
            • The banner should fit the full width of the page (you will need to change the rule for the container class to do this)

          • Task 3 - Create Pages from Your Template
            • Create the following pages from your template
              • How to Make a Template
              • How to Insert an Image
              • How to Make a Rollover Image
              • How to Make a Link
              • How to Change the Screen Resolution
              • How to Embed a Video
              • Helpful Websites

          • Extension Task
            • Start adding how to guides on to each of your pages
            • Make sure that each image is:
              • Saved in your images folder
              • Saved as a .png
              • Is less than 500kb